Showing posts with label restore. Show all posts

Monday, March 7, 2016

Progress in the Upstairs Hallway

Since we moved into The Papered House, our upstairs hallway has been in rough shape. I didn't take a "before" photo, but I'll try to describe what we were working with: The baseboards, crown molding, and door casings were covered in multiple layers of chipping paint. The floors were covered in a beige-colored carpet. The carpet must have been beautiful and plush when it was installed over twenty years ago. However, our house's only bathroom is on the second floor, at the end of the hall. As a result, this area has gotten a lot of foot traffic over the years, and the carpet had definitely seen better days. A previous owner had removed wallpaper and applied a coat of primer before putting this house on the market. However, there is no window in this hallway, and the space always felt dark and dingy despite there being light primer on the walls.

To add insult to injury, we definitely made the hallway worse. We knew we wanted to rip out the carpet, so we didn't make an effort to protect it while working on any other home improvement projects. We dripped all types of paint, paint stripper, and spackle on the carpet and it soon started to look much worse. Like a Jackson Pollack painting gone terribly, terribly wrong.

We've now made some progress is the hallway and it is starting to look so much better.

Papered House_Upstairs Hall 

My husband stripped all the paint off the baseboards and door casings. There are five doors in this space, so that process took at least a month. The wood trim has been painted with a fresh coat of "Relative White" from California Paints. As I described in my last post, my husband agreed to let me use caulk around the edges of the trim, and it made all the difference.  

We ripped up the carpet and discovered beautiful hardwood floors underneath. Given that this hall leads to our one and only bathroom, we had to be a bit creative about refinishing the hardwood if we were going to stay in the house. We decided to do a "quick refinish": we sanded off the top layer of finish, but didn't remove any stain. Then, we applied a new coat of finish immediately before going to bed, being sure to work our way towards the master bedroom. We were able to walk gingerly on the floors the next morning, provided we were barefoot. We repeated the process the next night to apply a second coat of finish.

 Papered House_Upstairs Hall Runner

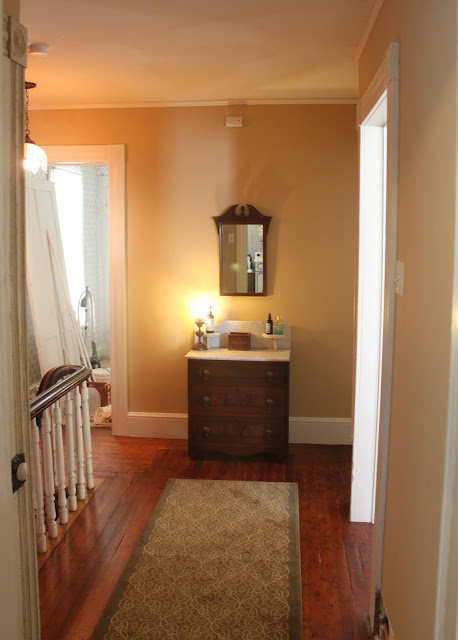
As I mentioned, there is limited natural light in this space. Rather than fighting the space and trying in vain to make it light and bright, we decided it would be better to work with what we have. Our goal became to make this space feel warm and cozy, rather than bright. Once we decided on this approach, choosing the paint color was much easier. The shade we used is called "Asian Jute" and it's from California Paint's Historic Colors of America collection. It's a deep beige with rich gold undertones.


According to the folks at California Paints, this particular shade has been used in almost every architectural period in American history: Colonial, Federal, Greek Revival, and Victorian. We like feeling this connection to the past and knowing that we've selected a color that has been used in American homes for hundreds of years.

Papered House_Antique Washstand

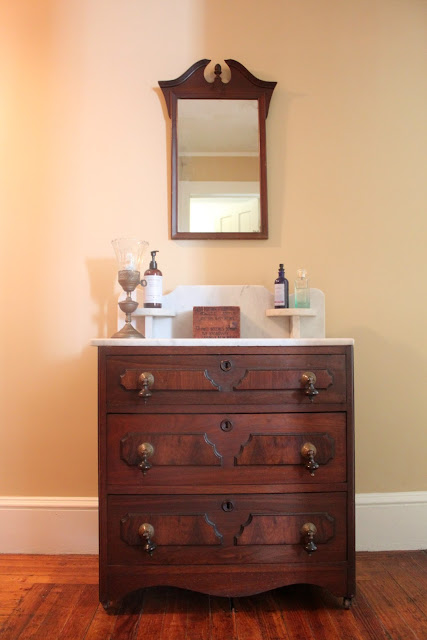
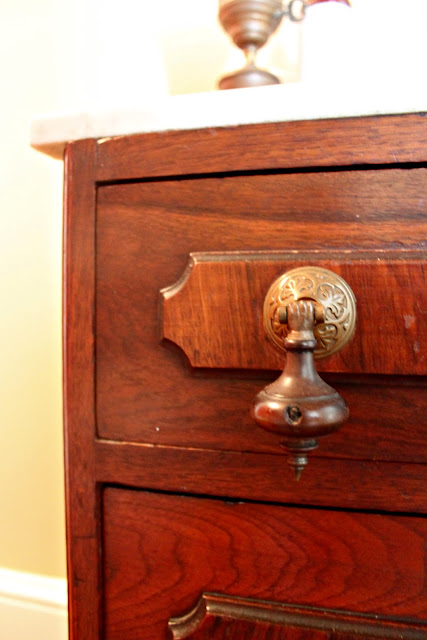
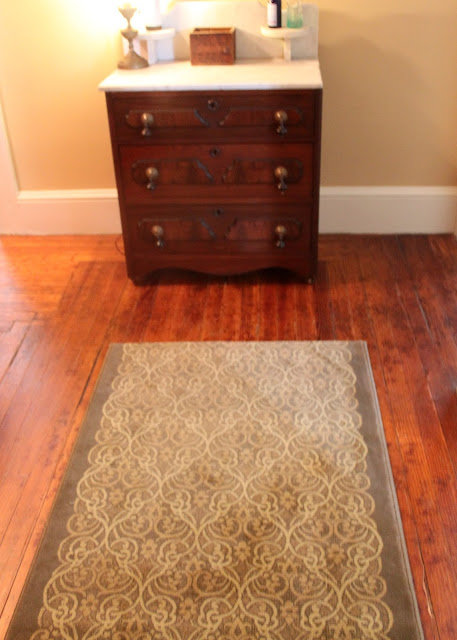
Our bathroom does not have a linen closet, so we store linens in this antique washstand. We believe this dates to the 1920s or 1930s. The marble top is one of my favorite features, as well as the intricate hardware.

Papered House_Antique Washstand Pulls

A small antique lamp sits on top of the washstand. Its twin lives one flight down, on a table in our entry hall.


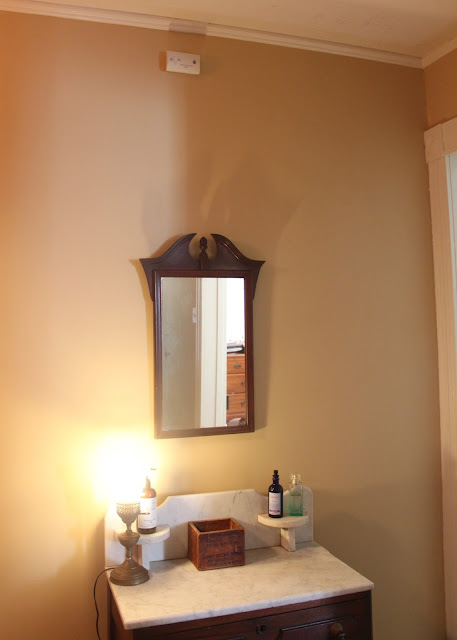
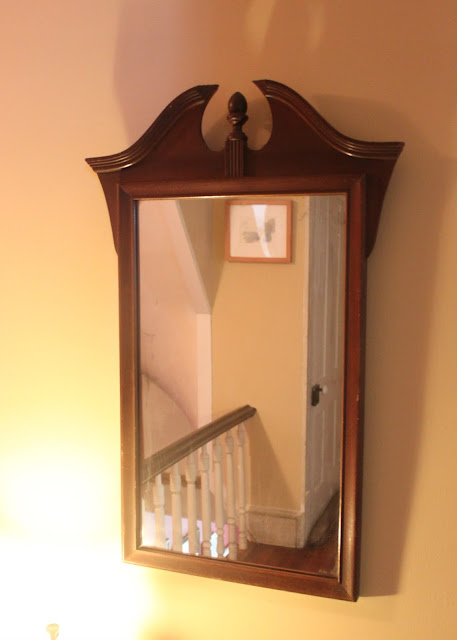
If my husband and I ever need to get ready at the same time, this mirror comes in handy. I can work on my hair and makeup out in the hallway, so that he's free to use the bathroom. It's just an added bonus that this mirror casts a shadow resembling the Bat Signal.


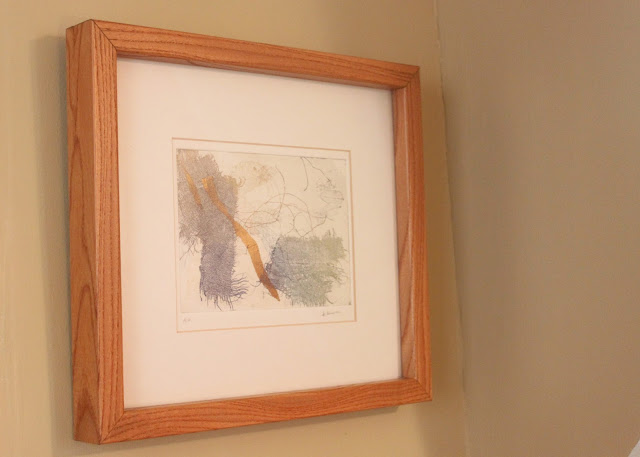
Last but not least, this cherished piece of artwork was a wedding gift from a former boss. His wife is an artist and she made this lovely mixed-media piece. The gold and olive green tie in perfectly with the wall color and the runner we chose for this space.


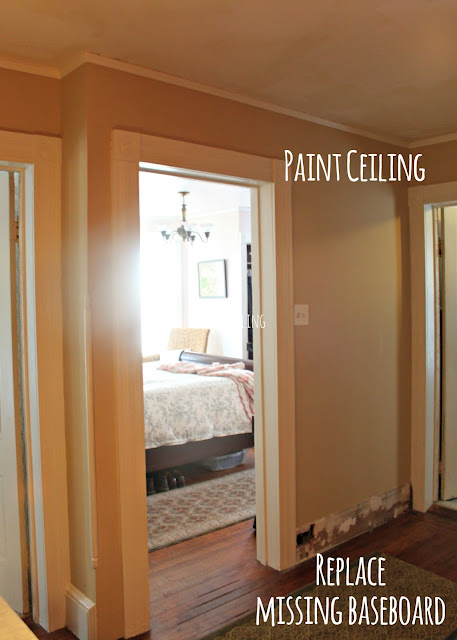
As with all of our projects, this one isn't quite done. We still need to repair some cracks in the ceiling and give it a fresh coat of paint. One of the baseboards was in very bad shape, so we pulled it off and will be installing a new one soon. Not seen in this picture is our attic door, which still needs some work. We're waiting for the weather to warm up so that we can remove the door from its frame and take it to the basement to finish removing the paint.


 Thanks for reading, folks. Have a wonderful week!
Bookmark and Share

Friday, March 4, 2016

The Caulk Fight

My husband and I recently had a fight. A major difference of opinion, if you will. About caulk.

Yes, caulk.

Are you picturing two adults wielding caulk guns, battling it out like a glorified Silly String fight? I wish it were that fun. It was not. This was a verbal tiff. Fortunately, we were able resolve our differences without resorting to projectile home improvement materials.

This is what happens when you've been in a relationship with the same person since you were both 19 years old, and you have nothing else to argue about: at this point, we agree on all the big things, like family priorities, finances, career goals, politics, and religion. Sure, there are small things we disagree about. He doesn't like that I squeeze the toothpaste right in the middle of the tube, every.single.time. I don't like that he hangs his towel on the shower curtain rod, rather than using the empty towel rack.

After a while, we get tired of arguing about toothpaste and towels. We just decide to let it go, because we do not care that much about toothpaste or towels. Instead, we fight about caulk. And the stakes start to feel very high, because we argue so infrequently. We are both strong-willed and accustomed to being in control. It's not a great recipe for compromise. 

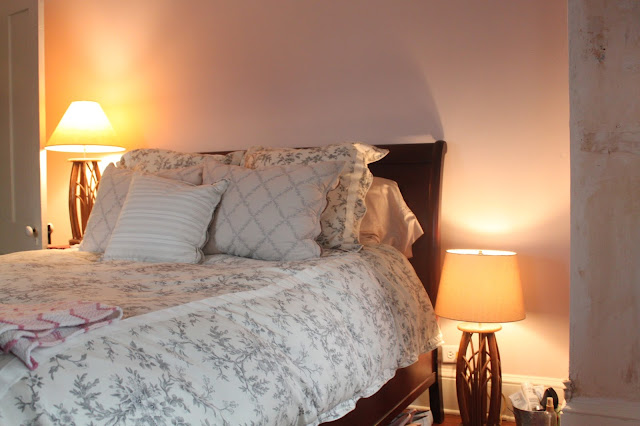
When I posted detail shots of our master bedroom, you may have noticed the gaps between the plaster and the crown molding:


Or those little crumbly holes hiding in this corner behind the lamp:


Perhaps you were so enchanted by our lovely antique lamps that you didn't notice the holes (Ha!). Or perhaps you noticed the holes and gaps, but were too polite to point them out. I suspect it's the latter. After all, this is a blog written for people, not magpies. I'm sure you were not fooled by the shiny, pretty things in front of the very imperfect things (I wish that strategy worked, but it doesn't). Thank you for graciously ignoring our house's imperfections.

When my husband S sees those holes, he thinks of words like "character" and "authenticity."

When I see those holes, I think of words like "sloppy" and "unfinished." And also, "vexing." Very vexing. I've painted these walls with two finish coats, so presumably the walls should be done. I should be moving on to other projects. But now that I've seen those gaps and holes, I cannot unsee them. I fixate on them every time I come into the bedroom. And similar gaps can be found in other places in our home, as well.

I figured the solution was to fill in those gaps with latex caulk, then touch up the bedroom wall (or repaint the whole wall if needed.) In hindsight, I regret not spending a bit more time prepping the walls, because repainting an entire wall will take much longer. When I suggested filling in the holes with caulk, S looked horrified and very emphatically told me, "I am not okay with using caulk on our plaster walls. Definitely NOT." His objection is not that it would be a waste of time to redo the nearly-finished work in this room. This would be a fair point, but it's not the point he's making. His issue is with the caulk itself.

Keep in mind: I am not suggesting we use caulk to fix structural issues. To repair plaster cracks, we used Big Wally's Plaster Magic. It's a pricey product, but the results seem worth the investment. To repair larger issues in our walls, my husband has been teaching himself how to apply plaster (brown coat, scratch coat, skim coat...the whole nine yards). I am only suggesting using caulk to fill these tiny, hard to reach holes that are purely aesthetic. The caulk would serve no structural or functional purpose whatsoever.

Whenever I'm told I can't do something, I demand to know the reason. And then, once the reason has been supplied, I tend to be enormously skeptical about the validity of the reason. It's not a trait I'm proud of. 

My husband says that historic preservationists often discourage caulk because it does not bond with the plaster. Apparently, the caulk just sits on top of the plaster. I agree with my husband that we should do everything in our power to preserve the plaster. If there is any risk that the caulk will damage the plaster or the woodwork, I don't want to use it. But if caulk doesn't damage the plaster, then I can't see the harm in using it.

I admire his dedication to history and to honoring historic methods, materials, and tools. I think many old homes fall victim to repairs that do not respect the original materials or architecture. I doubt that either of us will ever be guilty of intentionally compromising our home's character. But at the end of the day, I'm also interested in a satisfactory result. I don't want it to look like we cut corners. I want to see the proof of our hard work. 

So, I challenged my husband to produce the evidence: I wanted to read the articles/blog posts/forum conversations/technical papers for myself. Tell me precisely which preservationists have determined that we can't use caulk. Because if I have to keep looking at these holes and gaps on a daily basis, I want to know who is to blame for my discontent (I'm kidding...sort of). But I genuinely wanted to understand why it would, apparently, be so detrimental to use caulk on our historic walls. What's the danger of using caulk on plaster?

I gave my husband a ten day ultimatum: produce satisfactory anti-caulk evidence, or else I am buying a tube of caulk.

I was victorious:


Before the end of the ten day period, my husband surrendered. He told me to go ahead and buy the caulk. I'm not sure what happened. It's possible he relented when he saw how much those holes were bothering me. It's possible that he wasn't able to locate the anti-caulk articles. It's also possible that he invented the "evidence" all along. I'll never know. But it doesn't matter because caulk is a go!

Don't tell S, but in truth, I was about to surrender. I had nearly resigned myself to looking at these holes every day. After all, the man agreed to light pink in our master bedroom. That counts for a lot in my book. It should have been my turn to compromise, right? But S is a better, less stubborn person than I am.

To celebrate my success, I experimented with the caulk gun last weekend, filling in the gaps around the door casings in our upstairs hallway. Here are a few before and after photos.


The upstairs hallway has now been freshly painted and the caulk made all the difference. I can hardly believe how good the hallway looks, thanks to a little caulk. I'll share the hallway makeover in a few days. And in the coming weeks, I'll be filling in all those gaps in our bedroom. Hooray!
 

~The Papered House has a strange definition of success


Bookmark and Share

Friday, February 5, 2016

Master Bedroom Progress, Part 2


When I last posted about our Master Bedroom, the walls were mostly painted and we had restored the first of the five windows. The bedroom was habitable, but far from complete. At the time, I had divided our remaining projects into "short-term" and "long-term" tasks. Here is that list, and an update of where we stand thus far:

Short-Term Project List
*Repair all windows - 75%
*Paint crown molding - NO
*Prep and paint narrow walls to the left of the alcove - YES
*Stencil ceiling - 5%
*Repaint and rehang entry door - YES
*Repaint and rehang closet door - NO

Longer-Term Project List
*Purchase new/antique nightstand(s) - NO
*Purchase antique table lamps - YES
*Purchase small antique chandelier - YES
*Hang some additional artwork - YES
*Refinish husband's dresser (not pictured) - NO
*Improve storage (maximize space in closet and under the bed; find/create some storage solution for me) - 50%.

As you can see from that list, we were a bit flexible with our approach to prioritizing tasks. We moved on to some of the long-term tasks before completing the short-term ones. This probably sounds like poor project management, but it was the right choice.

In this post, I'll talk specifically about repairing the windows and the walls next to the alcove.

Windows:
We've now restored four of the five windows in this room. They've each gotten soup to nuts restoration: first we stripped the old paint from the wood and hardware, then applied new glazing, new oil-based paint, new sash cords, and new brass weatherstripping. After repairing the first window, we identified three areas for improvement: improved speed, improved craftsmanship of our glazing, and improved craftsmanship of our paint job.


We've done a little better in all those areas, but we still have lots of room for improvement. But there was one area where we did far worse: keeping the glass intact.

When we repaired the first window, we removed all the crumbly glazing. We then removed the panes of glass completely, primed the window sashes, reinserted the glass and applied new glazing. When we tried this same approach for the second window, the glass shattered. On both the top and bottom sashes. When the first pane shattered, we thought it was a fluke. We were heartbroken, but figured that perhaps there was a hairline crack that we hadn't noticed. Then we cracked the second pane, and we became more concerned. Clearly we were doing something wrong.

We had no obvious explanation for the broken glass: we did not drop it or bump it against another object. We lifted it carefully and set it down carefully.

These are large panes of original wavy glass, and it turns out that they are so thin and brittle that simply holding them incorrectly can cause them to break.

When the glass broke, I was reminded of a conversation I had with an antiques dealer. He said that one of his biggest disappointments is breaking an antique that he knows has been treasured and passed down from generation to generation. There are few feelings worse than knowing that you are responsible for ruining an item that had otherwise stood the test of time. He was so right.

We were especially devastated when we learned that this glass was somewhat unusual for a house like ours. Our house was built c.1880 and glass manufacturing technology had recently made great strides. However, large panes of glass were still very costly. For this reason, most houses in the 1880s had windows that were built with two (or more) smaller panes of glasses on each sash. This is called a "two-over-two" configuration, and it's what we have on the rear windows and most side windows. On the front of our house, however, the windows have a single large pane of glass in each sash. This is known as a "one-over-one" configuration. I've seen these types of windows on the Victorian mansions in our town, but rarely on more modest homes like ours. The previous owners likely made a large investment when choosing these one-over-one windows, and I'm sure they were a point of pride for the house's inhabitants. The fact that the one-over-one windows are only on the front of our house shows that they were too costly to use throughout. We were so discouraged when the glass broke that we ended up stepping away from window repair for a few weeks and reevaluating our process.

When we resumed the window repair, we replaced the broken glass on the second window with old glass from an antique store. It's not as old or wavy as our glass, but we figured it would be a better approximation than using new glass.

Note: I apologize that these pictures are so dark. This room gets a lot of natural light, but I'm having a hard time capturing light in any pictures I take of this room. 


For the third and fourth windows, we decided to restore the windows without removing the glass, given our bad track record. In addition, both of these windows already had small cracks in the glass (not our doing!). We thought preserving the original glass was worthwhile, even if the glass isn't perfect. Our solution for now is to leave the original glass in place, and put a thin layer of epoxy over the cracked section. We'll see how well it holds up. If we ever have children, we may decide on a different approach. With our previous approach, we replaced all the old glazing. With our new approach, we just removed any loose glazing, then applied a thin layer of new glazing over the existing, intact glazing. We did not attempt to lift or remove the glass. Here is what the restored third and fourth windows look like.


I'd say that we're about 75% finished with the window repair in this room. Windows three and four still need new interior stops. We also still need to repair the fifth window (not pictured). When we finished the fourth window, it was late November or early December. Since we need to remove each window for about a month in order to restore them, we decided to wait until spring to tackle the fifth window. 


Here's another close-up picture of the restored window. The new brass weatherstripping has done a great job of eliminating drafts in this room. To make the seal even tighter, we added temporary weatherstripping cord for the winter months. In the picture above, it's that squiggly stuff. It looks terrible, but it's keeping our room warm, so we'll live with it for a few more months.

Walls:
When we removed the wallpaper from this room, we were in for a surprise. In the section of wall next to the alcove, the plaster was in very bad shape. Large pieces of plaster fell away from the wall, exposing our brick chimney. And we were in for another surprise: it appeared that several of the bricks had been chiseled away, leaving a hole the size of a dinner plate.


According to our mason, this hole in the brick likely resulted from a potbelly stove being piped into the chimney. At some later point, the stove was removed and the wall was patched with a new layer of plaster, without replacing the missing bricks. As you might expect, the new plaster was weak in this section since there was nothing (i.e., no bricks) for it to adhere to.

This chimney is nonfunctional, but from a structural standpoint, we didn't particularly like the idea of the missing bricks. We asked our mason to fill in the missing bricks to the best of his ability. Since we were already doing so much exterior masonry work, the incremental cost for this repair was relatively minor.

This is the last picture I posted of this wall, which shows the repaired brick. At the time, we were considering leaving this small portion of brick exposed.


I love the look of exposed historic brick. However, after staring at our exposed bricks for several weeks (or was it months?) we decided that it just looked unfinished. We tried putting a picture frame around it, but it still didn't look right. We decided that this section of exposed brick was just too small to look intentional.

We had two options: 1) remove more plaster, exposing a larger section of the chimney. Hope it looks right, or 2) repair the missing plaster.

Ultimately, we decided to repair the plaster. My husband balked at the idea of tearing perfectly good plaster off the walls. He's also not fond of exposing masonry that wasn't originally intended to be seen. He's a purist that way, I guess.

So, no exposed brick for our bedroom. I will just have to enjoy other people's exposed brick via Instagram and Pinterest. The struggle is real.

We repaired most of the walls in our bedroom using Big Wally's Plaster Magic. I've spoken about Big Wally's before, and it does a fantastic job of repairing small and large plaster cracks. But it's not intended to repair holes the size of a dinner plate. So, my husband learned how to use plaster and patched the hole. Then I applied several coats of joint compound, smoothing the surface as best as I could. Our repair isn't perfect, but it's pretty good for our first time using plaster.


My husband enjoys all the imperfections in the plaster walls, with the thought that it gives our home character. I haven't come around to that viewpoint yet. I tend to focus on every bump and dimple in the plaster, and wish I had spent a little more time prepping the walls before painting. In hindsight, I might have applied one of two more coats of joint compound to get the surface as smooth and straight as possible.

Even so, compared with where we started, I think this wall is a case of "done is better than perfect." There's no longer a hole in our chimney or our walls. That's a good thing. 


Stenciling:
In my short-term project list, I planned to stencil the ceiling. In some of the pictures above, you can see that I started the border. I am happy with how it looks so far, but I haven't made much progress. I'll finish this project eventually, but it turns out that stenciling a ceiling is an incredibly slow process. I'm doing it by hand and working in small sections. Each 4-6" section of ceiling requires climbing down the ladder, refilling the brush, and climbing back up the ladder. The ceiling is going to look lovely when it's done, but it's been moved to the long-term project list. I can't quite remember why I thought stenciling the ceiling was important enough to be a short-term project.

We've also added a few decorative touches to this room, like new table lamps, an antique chandelier, and some better storage. I'll save those for a future post. Thanks for checking in, friends!

Bookmark and Share

Wednesday, October 7, 2015

Brick Behemoth

Full disclosure: This is a long post, filled with too many words and too few pictures. I won't be upset if you skip it entirely!

Here's the short version: Our chimneys are a pain in the butt. We stupidly spent $$$$ repairing a chimney, then discovered that it would never be functional. Our fireplace is ugly. I complain a bit. We have issues with some masons. I complain some more. One year later, repairs still aren't done. Winter is coming. Where is my wine?

Here's the much longer version:
One of the projects that's been hanging over our heads -- both literally and figuratively -- has been the chimney repair. We have a chimney on the side of our house and a corresponding fireplace in the dining room. Here is what the side chimney used to look like. 


We also have a rear chimney that is the exhaust for our oil burner (hence, no fireplace). Here is what the rear chimney used to look like.


When we moved into TPH, we knew that the exterior of both chimneys would need extensive repair. This picture doesn't accurately show the state of disrepair. When we moved in, we could see through our rear chimney because it was missing so much mortar. Bricks were coming loose and I couldn't help but think that the chimney resembled a game of Jenga, just before the blocks topple. The side chimney wasn't quite as far gone as the rear chimney, but it was still in bad shape.

We also knew that there was a good chance that our side chimney would need a new liner. We decided to tackle the exterior portion of the project before relining the side chimney, to avoid any further deterioration. This turned out to have been a bad decision, as I'll explain later.

In November of 2014, shortly after we moved in, we reached out to several masons to request a quote. We must have called a dozen masons to schedule a visit, but the response rate was abysmally low. 

After a few weeks of waiting for responses, we were getting impatient. We asked the local historical society to recommend a mason. They spoke very highly of a professional who had worked on several historic buildings in town (We'll call him Mason 1). After looking at his past projects we knew Mason 1 was the right choice. And honestly, since none of the other masons had returned our calls, he didn't have much competition.  

He wouldn't be able to do the work in the winter, so we waited for a few months to take further action. The chimney repair was going to be pricey, so we didn't mind holding onto the cash for a few extra months, anyway. We resumed the process in February, submitting the necessary paperwork to our town. And once the weather and our mason's availability synched up, he rebuilt/repointed both chimneys. His work was completed some time in late April/early May.

Here is a picture of our repaired side chimney. (Apologies for the poor photo quality)

Papered House_Repaired Historic Chimney

And here is a picture of our completely rebuilt rear chimney.

Papered House_Repaired Historic Chimney
I don't know much about chimneys, but I think they look great. Mason 1 used historic reproduction bricks and lime-based mortar to best replicate the construction and appearance of our original chimneys. Our goal with TPH has always been to restore "in-kind", using original materials and methods whenever possible. We were glad to find a mason who shared this commitment. I can't say enough positive things about this mason and his crew members. They were polite and considerate through the entire process, and left a clean work space. (if you're located in eastern PA or central NJ and need a mason, I'd be happy to provide a reference!).

The only downside to Mason 1 is that he does not install or inspect liners. But he gave us the name of another mason (I'll call him Mason 2) who does. We reached out to him to schedule a visual inspection and request a quote. Mason 2 came in mid-May and inspected the interior of our chimney. We learned some interesting info from him. 

See this fireplace? If you're thinking that it doesn't look particularly Victorian, you're right. 

Why is this NEW thing in my old home???

Mason 2 told us that this fireplace was likely installed around 1920-1930 based on the type of bricks that were used. The fireplace was built using butter joints, meaning that two bricks were "buttered" with mortar as if they were slices of bread and pressed together like a sandwich. In addition, he mentioned that the bricks on our fireplace were actually meant to be used for exterior masonry. It's a bit odd that they were used in an interior application (I have a theory about this, but I'll save it for another time. This post is already too long). Finally, the diagonal orientation of the firebox is not original. The original fireplace would have been built flat against the side wall.

The good news: This fireplace is solid and well-built. Mason 2 was impressed by the quality of the craftsmanship.

The bad news: From an aesthetic standpoint, this fireplace is all wrong. Before we even set foot inside TPH, I could tell from the realtor's listing pictures that this fireplace was a later addition to the home. It's not historically appropriate and it doesn't match the character of the house. I also think it feels too big for the room. Based on what Mason 2 told us, the original fireplace was likely built to accommodate a coal-burning stove. It was never meant to have an open fire, although we can clearly tell that previous owners used this fireplace to burn wood. The fireplace does not draft properly, which explains all the soot and smoke stains around our mantle (yes, I know I need to give that brick a good cleaning!).  

The very bad news: Unfortunately, whoever built this fireplace in the 1920s didn't foresee 21st century code requirements. The flue is so narrow that our only option is to install a wood-burning stove. If we choose to install a wood-burning stove, we cannot select a simple stainless steel liner. According to Mason 2, there is precisely one (one!) liner product that will pass code and fit into our chimney. It would be some sort of specialized cement liner that would be custom-made for our chimney.

Mason 2 happens to be one of the licensed installers for that liner product. He warned us that it could be a very expensive repair, but we requested a quote anyway. This was in May. But it's now October and we still hadn't received the quote, despite several attempts to follow up. We had a good feeling about Mason 2 when he came to visit, but he doesn't seem interested in our project anymore.  

Since we couldn't make any progress with Mason 2, we scheduled a third mason (Mason 3) to inspect our chimney. Mason 3 did a visual inspection and told us that a stainless steel liner might be possible, but not easy. We started to feel hopeful that this project wasn't a lost cause. We also started to feel hopeful that the project might be more affordable than we initially thought.

Mason 3 came back a second time to do a "Level 2" inspection, meaning that he viewed the inside of our chimney with a digital camera. This time, the news was not good: at its narrowest point, the flue was only 4" wide (narrower even than Mason 2 had realized). That's too narrow for a stainless steel liner. It's too narrow for any liner, so this fireplace cannot be safely used. Mason 3 then suggested several short-cut options that led me to doubt his familiarity with historic building materials and his adherence to code requirements. As if that weren't bad enough, Mason 3 repeatedly called me "sweetie" throughout the inspection. I've never been called "sweetie" by a stranger -- certainly not a male stranger. In this context if felt simultaneously unprofessional, patronizing, and too familiar.

So, almost a year after we started this process, we're back to the drawing board. We've resigned ourselves to the fact that our side chimney will never be functional unless we rebuild it from the ground up. This is not the conclusion we wanted to reach after doing pricey exterior repairs. A total rebuild would involve tearing down plaster and disturbing walls. It would also cost a fortune, so it's at the very bottom of our priorities. We're kicking ourselves for spending thousands of dollars fixing the masonry on a non-functional chimney. If we had known that the side chimney would never be functional, we would have delayed its repair and allocated our resources towards other repairs. We're rookie homeowners and our inexperience got the best of us. We were overeager to cross projects off our list and didn't do as much due diligence as we should have before starting the chimney repair. But hindsight is 20/20 and we learned valuable lessons.

Although the side chimney will remain non-functional, there are still some associated repair items we need to complete before we move on from this project. The side chimney needs to have a cap installed so that critters won't intrude. We still need to have copper flashing installed on both chimneys, since the existing flashing is in poor shape. The flashing isn't leaking yet but it's only a matter of time, especially with wetter weather on the way.

But there is a silver lining: We had set aside a significant chunk of cash for The Chimney Liner That Wasn't. Now that we aren't lining the chimney, we may have the budget for some other important exterior work. We'd like to bring in a roofer to do some maintenance on our slate roof and reline our Yankee gutters. We assumed that we'd need to wait until 2016 to do these projects, but now it looks like those projects might happen this fall. Or, we may use the extra funds to replace my 13-year-old car. In either scenario, we'll be glad to have the cash on hand.

Bookmark and Share

Wednesday, August 26, 2015

Window Repair Progress

I am happy to report that we now have one fully-functional, fully-repaired window in the master bedroom. This is cause for celebration! Let's pop a bottle of bubbly...just don't point it towards the newly repaired window, please. If that glass cracks after all this hard work, I will scream.


We started this process approximately two months ago and, in truth, the repair still isn't quite complete on this window. We still need to paint and install new interior stops and then, we'll be done. But I was anxious to write this post. Plus, once the stops are installed, you won't be able to see as much of the window's "guts" as you can see now. For an "in progress" post, I thought it would make sense to have pictures that show more of the window's interior workings. (Here is a diagram with window anatomy, in case it's helpful).

Bookmark and Share

Wednesday, July 29, 2015

Master Bedroom Progress

Our master bedroom is still a work in progress, but it's looking loads better than it did previously. I think this is my new mantra: it's not as bad as it used to be.

The walls are (mostly) painted and we've hung a couple of pieces of artwork.


I still need to prime and paint this wall. The masonry was repaired recently, and we needed to wait for the mortar to cure before we could repair the plaster. Now that the mortar has cured, we're considering leaving that small portion of brick exposed, if we can make it look intentional. We're still thinking about this, so this section of wall has remained unpainted for now. 


We've moved our furniture into the bedroom, and it feels like a functional, cozy space. 


We really dislike those lamps, and the fact that they have mismatched lamp shades. But we found them in the basement, left behind by a former owner. Our love of saving money trumped our dislike for these lamps. We'll replace them eventually, but they're fine for now.

We even have a door on the doorframe (Wow! Getting fancy at the Papered House!). It's not the right door for this room, so it doesn't close completely. We took this door from another room while we repaint the actual master bedroom door. Having a door on one's bedroom hardly seems like something worth celebrating. But in this house, it is.


We've refinished the wood floors and found some pretty rugs. Apparently I didn't vacuum/sweep very well before I took this photo. Sorry about that.


The window repair is in progress. The alcove is missing the left window, which is currently in our basement for repair. So far, window repair has been pretty straightforward. However, we're reglazing each window and it took 10 days for the glazing on the first window to dry. I'll be repainting with oil-based paint later this week. It's my first time painting with an oil-based product, and I understand that it typically dries more slowly than latex-based paint. We've got about 50 windows in this house, so we're projecting a window completion date of roughly...2080. Hooray, just in time for our home's 200th birthday!

In the meantime, we're using heavy-duty plastic, painter's tape, and duct tape to keep the bugs and other flying critters out of our room. There's no particular reason for the use of two types of tape; we just used whatever we had on hand and could find quickly. Apparently, we have tape in all sorts of hideous colors.


Window repair supplies

Here's another of the master bedroom windows in sore need of repair. I considered moving the fan before taking this picture, thinking that it would make for a more attractive photo. But honestly, when your windows look like this, the fan is NOT the problem. The ropes on this window are broken, so the fan is the only thing keeping that sash from slamming closed.

I've got 99 problems, but the fan ain't one.


And when this is the view next to the window, suddenly those windows don't look so bad in comparison to the closet door. I'm not sure why we're still keeping clothes in that closet...


Don't worry, that closet door is being fixed. We've been using safe chemical strippers to remove the paint, and it will get a new coat of paint soon.  


Here's a quick look at the remaining projects for this room.

Short Term Project List
*Repair all windows
*Paint crown molding
*Prep and paint narrow walls to the left of the alcove
*Stencil ceiling
*Repaint and rehang entry door
*Repaint and rehang closet door

Longer-Term Project List
*Purchase new/antique nightstand(s)
*Purchase antique table lamps
*Purchase small antique chandelier
*Hang some additional artwork
*Refinish husband's dresser (not pictured)
*Improve storage (maximize space in closet and under the bed; find/create some storage solution for me)

By the way, I just set up an Instagram account. I've been posting a lot of pictures of our garden, which looks a lot better than our master bedroom does. And feel free to follow along on Facebook and Twitter as well, if that's your thing. Thanks for stopping by, folks!


Bookmark and Share

Wednesday, July 8, 2015

Blush Pink for the Master Bedroom


I almost named this post "In which my husband agrees to a blush pink bedroom, because the Victorians said so." But that title was far too long. Plus, I thought it might imply that my husband lacks strong opinions about interior decor. That would be misleading. In fact, he's so committed to historically appropriate decor that he agreed to paint our bedroom a color that looks suspiciously like ballet slippers, in spite the fact that he doesn't really like the color.

Anyway, let me provide some background before I bore you with paint color research.

Last night, I came across an email I wrote to my sister-in-law. Among other things, I mentioned that we would be working on our master bedroom over the weekend, hoping to make significant progress. That email was dated March 6. It's now solidly July, and the master bedroom is still a work in progress.
Bookmark and Share

Wednesday, May 6, 2015

The Papered House Project List: January - May Update


Back in January, I posted a list of projects we wanted to accomplish by the end of March. And now that it’s May (May!), I’m finally providing a long-overdue update on the progress we’ve made thus far. Summer is just around the corner, and we’re not yet finished with the things we wanted to complete by March. With each project, we're coming to the realization that everything takes much longer than expected. I suppose that delays are just a fact of life with renovation projects, particularly when working on an older home.  

Once I started to update this list, I realized that we actually have accomplished quite a bit. Obviously, we’re not nearly as far along as we wanted to be, but we’ve still made some good progress. Here’s where we stand as of today:

 
Exterior:
*Repair missing tiles on slate roof (hire professional): Done! There was a bona-fide hole in our roof when we bought this house. As soon as we moved in, we started searching for a contractor to repair our roof. It turns out that most roofers aren’t interested in working on slate roofs, so finding a contractor was more difficult than we had anticipated.  Every time it rained or snowed, I felt like crying. But we eventually found a roofer, and as of January, the hole is gone. This fact alone is worth celebrating.

*Repoint side chimney. Repair/install liner if needed (hire professional): In progress. The mason hasn't started repointing yet, but is evaluating the condition of the side chimney. He initially thought that it would just require repointing, but is now thinking that a full rebuild might be needed. He's going to examine it more this week and give us details. If a full rebuild is required, it will change the cost of this project considerably and we might need to go back to the city for another set of approvals. I'm hoping a full rebuild won't be necessary, but it might be. At this point, we’re not certain what work will be required on the liner, either.

*Rebuild rear chimney.  Repair/install liner if needed (hire professional): Also in progress, at this very moment. As I type this, the mason and his apprentice are chipping away at our rear chimney and preparing to rebuild it. We also have this awesome piece of construction equipment in our yard for the duration of the project:


*Install flashing on chimneys (hire professional). Outstanding; will happen once other chimney repairs are complete.  


One of our first realizations about exterior work is that it’s (of course!) highly dependent on the weather. We’ve had the permits and town approvals for the chimney repairs since late February. However, our mason wanted to wait for a stretch of warm, relatively dry days before starting repairs on our chimney. This is especially important since he’s using a lime-based mortar similar to what would have been used when our house was built in the 1880s. Apparently, this type of historic mortar takes much longer to cure than modern mortar, so one should avoid masonry work when there is the threat of inclement weather. I'm not sure what I was thinking when I thought we could have all this exterior work done by the end of March; my expectation wasn't realistic given that we were still getting considerable amounts of snow in late March.

Bookmark and Share

Monday, March 16, 2015

Guest Room Ceiling

Just a quick post for today -- we finally finished the guest room ceiling! In my first post on the guest room, you could see that that there were quite a few cracks in the plaster, which we (ie, my husband) repaired. But then it took me ages to sand the ceiling after the plaster repairs were completed. Sanding is easy, but it turns out that standing on a ladder and craning one's head/neck upwards while a fine mist of plaster/spackle dust descends on one's face is not the most enjoyable way to spend a weekend.

But the end result was worth the trouble. There are still some imperfections and I wasn't able to sand the ceiling completely smooth for fear of reopening some of the cracks. Still, it's an improvement. Here is what the ceiling looks like now:


The paint color looks white in this photo, but it's actually a light greenish-gray that's reminiscent of sea glass. The color is Amelia from California Paints and it works nicely with the Cottage Green that we used for the walls. 

And here is what the ceiling looked like after the repairs, but before it had been sanded, primed, and painted.


That's all for now. This week, I'm planning to repair and preserve the wallpaper in our family room. If all goes according to plan, the preserved wallpaper should look exactly the same as it does now (sounds like that will be a boring set of "before" and "after" photos, right?).
Bookmark and Share