Monday, March 7, 2016

Progress in the Upstairs Hallway

Since we moved into The Papered House, our upstairs hallway has been in rough shape. I didn't take a "before" photo, but I'll try to describe what we were working with: The baseboards, crown molding, and door casings were covered in multiple layers of chipping paint. The floors were covered in a beige-colored carpet. The carpet must have been beautiful and plush when it was installed over twenty years ago. However, our house's only bathroom is on the second floor, at the end of the hall. As a result, this area has gotten a lot of foot traffic over the years, and the carpet had definitely seen better days. A previous owner had removed wallpaper and applied a coat of primer before putting this house on the market. However, there is no window in this hallway, and the space always felt dark and dingy despite there being light primer on the walls.

To add insult to injury, we definitely made the hallway worse. We knew we wanted to rip out the carpet, so we didn't make an effort to protect it while working on any other home improvement projects. We dripped all types of paint, paint stripper, and spackle on the carpet and it soon started to look much worse. Like a Jackson Pollack painting gone terribly, terribly wrong.

We've now made some progress is the hallway and it is starting to look so much better.

Papered House_Upstairs Hall 

My husband stripped all the paint off the baseboards and door casings. There are five doors in this space, so that process took at least a month. The wood trim has been painted with a fresh coat of "Relative White" from California Paints. As I described in my last post, my husband agreed to let me use caulk around the edges of the trim, and it made all the difference.  

We ripped up the carpet and discovered beautiful hardwood floors underneath. Given that this hall leads to our one and only bathroom, we had to be a bit creative about refinishing the hardwood if we were going to stay in the house. We decided to do a "quick refinish": we sanded off the top layer of finish, but didn't remove any stain. Then, we applied a new coat of finish immediately before going to bed, being sure to work our way towards the master bedroom. We were able to walk gingerly on the floors the next morning, provided we were barefoot. We repeated the process the next night to apply a second coat of finish.

 Papered House_Upstairs Hall Runner

As I mentioned, there is limited natural light in this space. Rather than fighting the space and trying in vain to make it light and bright, we decided it would be better to work with what we have. Our goal became to make this space feel warm and cozy, rather than bright. Once we decided on this approach, choosing the paint color was much easier. The shade we used is called "Asian Jute" and it's from California Paint's Historic Colors of America collection. It's a deep beige with rich gold undertones.


According to the folks at California Paints, this particular shade has been used in almost every architectural period in American history: Colonial, Federal, Greek Revival, and Victorian. We like feeling this connection to the past and knowing that we've selected a color that has been used in American homes for hundreds of years.

Papered House_Antique Washstand

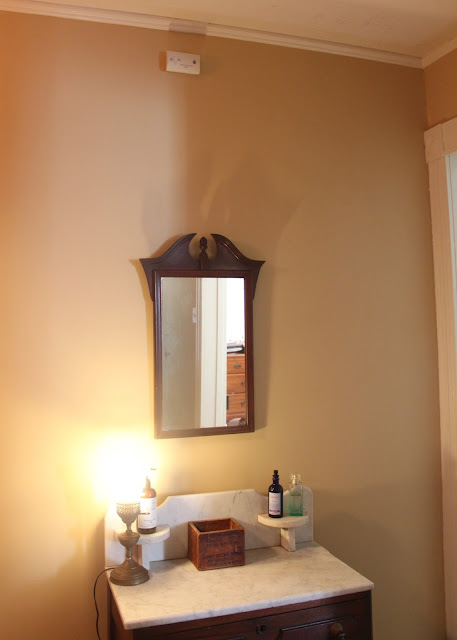
Our bathroom does not have a linen closet, so we store linens in this antique washstand. We believe this dates to the 1920s or 1930s. The marble top is one of my favorite features, as well as the intricate hardware.

Papered House_Antique Washstand Pulls

A small antique lamp sits on top of the washstand. Its twin lives one flight down, on a table in our entry hall.


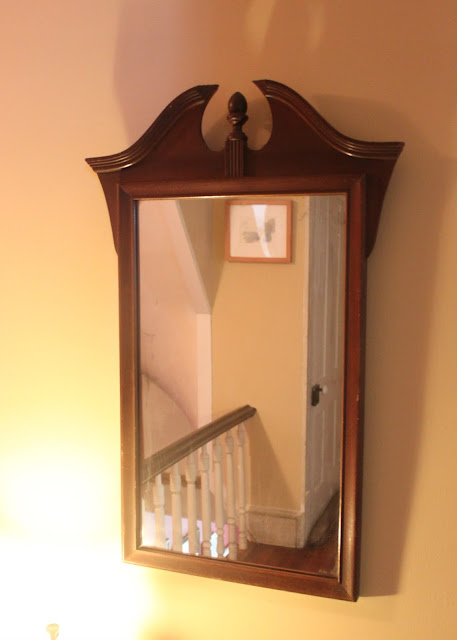
If my husband and I ever need to get ready at the same time, this mirror comes in handy. I can work on my hair and makeup out in the hallway, so that he's free to use the bathroom. It's just an added bonus that this mirror casts a shadow resembling the Bat Signal.


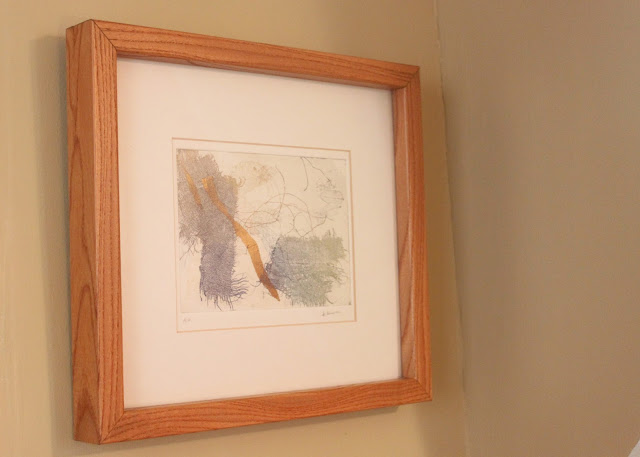
Last but not least, this cherished piece of artwork was a wedding gift from a former boss. His wife is an artist and she made this lovely mixed-media piece. The gold and olive green tie in perfectly with the wall color and the runner we chose for this space.


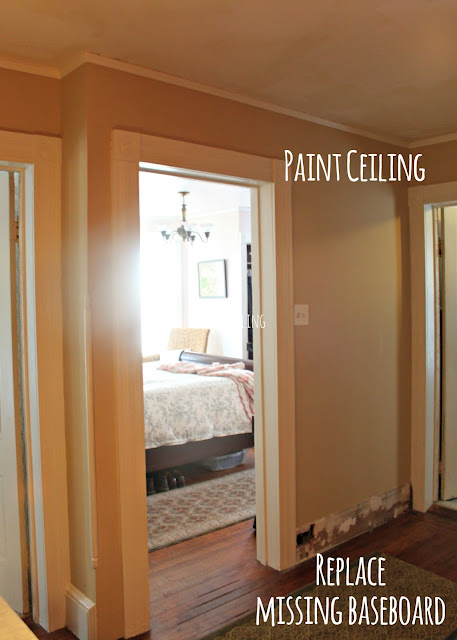
As with all of our projects, this one isn't quite done. We still need to repair some cracks in the ceiling and give it a fresh coat of paint. One of the baseboards was in very bad shape, so we pulled it off and will be installing a new one soon. Not seen in this picture is our attic door, which still needs some work. We're waiting for the weather to warm up so that we can remove the door from its frame and take it to the basement to finish removing the paint.


 Thanks for reading, folks. Have a wonderful week!
Bookmark and Share

Friday, March 4, 2016

The Caulk Fight

My husband and I recently had a fight. A major difference of opinion, if you will. About caulk.

Yes, caulk.

Are you picturing two adults wielding caulk guns, battling it out like a glorified Silly String fight? I wish it were that fun. It was not. This was a verbal tiff. Fortunately, we were able resolve our differences without resorting to projectile home improvement materials.

This is what happens when you've been in a relationship with the same person since you were both 19 years old, and you have nothing else to argue about: at this point, we agree on all the big things, like family priorities, finances, career goals, politics, and religion. Sure, there are small things we disagree about. He doesn't like that I squeeze the toothpaste right in the middle of the tube, every.single.time. I don't like that he hangs his towel on the shower curtain rod, rather than using the empty towel rack.

After a while, we get tired of arguing about toothpaste and towels. We just decide to let it go, because we do not care that much about toothpaste or towels. Instead, we fight about caulk. And the stakes start to feel very high, because we argue so infrequently. We are both strong-willed and accustomed to being in control. It's not a great recipe for compromise. 

When I posted detail shots of our master bedroom, you may have noticed the gaps between the plaster and the crown molding:


Or those little crumbly holes hiding in this corner behind the lamp:


Perhaps you were so enchanted by our lovely antique lamps that you didn't notice the holes (Ha!). Or perhaps you noticed the holes and gaps, but were too polite to point them out. I suspect it's the latter. After all, this is a blog written for people, not magpies. I'm sure you were not fooled by the shiny, pretty things in front of the very imperfect things (I wish that strategy worked, but it doesn't). Thank you for graciously ignoring our house's imperfections.

When my husband S sees those holes, he thinks of words like "character" and "authenticity."

When I see those holes, I think of words like "sloppy" and "unfinished." And also, "vexing." Very vexing. I've painted these walls with two finish coats, so presumably the walls should be done. I should be moving on to other projects. But now that I've seen those gaps and holes, I cannot unsee them. I fixate on them every time I come into the bedroom. And similar gaps can be found in other places in our home, as well.

I figured the solution was to fill in those gaps with latex caulk, then touch up the bedroom wall (or repaint the whole wall if needed.) In hindsight, I regret not spending a bit more time prepping the walls, because repainting an entire wall will take much longer. When I suggested filling in the holes with caulk, S looked horrified and very emphatically told me, "I am not okay with using caulk on our plaster walls. Definitely NOT." His objection is not that it would be a waste of time to redo the nearly-finished work in this room. This would be a fair point, but it's not the point he's making. His issue is with the caulk itself.

Keep in mind: I am not suggesting we use caulk to fix structural issues. To repair plaster cracks, we used Big Wally's Plaster Magic. It's a pricey product, but the results seem worth the investment. To repair larger issues in our walls, my husband has been teaching himself how to apply plaster (brown coat, scratch coat, skim coat...the whole nine yards). I am only suggesting using caulk to fill these tiny, hard to reach holes that are purely aesthetic. The caulk would serve no structural or functional purpose whatsoever.

Whenever I'm told I can't do something, I demand to know the reason. And then, once the reason has been supplied, I tend to be enormously skeptical about the validity of the reason. It's not a trait I'm proud of. 

My husband says that historic preservationists often discourage caulk because it does not bond with the plaster. Apparently, the caulk just sits on top of the plaster. I agree with my husband that we should do everything in our power to preserve the plaster. If there is any risk that the caulk will damage the plaster or the woodwork, I don't want to use it. But if caulk doesn't damage the plaster, then I can't see the harm in using it.

I admire his dedication to history and to honoring historic methods, materials, and tools. I think many old homes fall victim to repairs that do not respect the original materials or architecture. I doubt that either of us will ever be guilty of intentionally compromising our home's character. But at the end of the day, I'm also interested in a satisfactory result. I don't want it to look like we cut corners. I want to see the proof of our hard work. 

So, I challenged my husband to produce the evidence: I wanted to read the articles/blog posts/forum conversations/technical papers for myself. Tell me precisely which preservationists have determined that we can't use caulk. Because if I have to keep looking at these holes and gaps on a daily basis, I want to know who is to blame for my discontent (I'm kidding...sort of). But I genuinely wanted to understand why it would, apparently, be so detrimental to use caulk on our historic walls. What's the danger of using caulk on plaster?

I gave my husband a ten day ultimatum: produce satisfactory anti-caulk evidence, or else I am buying a tube of caulk.

I was victorious:


Before the end of the ten day period, my husband surrendered. He told me to go ahead and buy the caulk. I'm not sure what happened. It's possible he relented when he saw how much those holes were bothering me. It's possible that he wasn't able to locate the anti-caulk articles. It's also possible that he invented the "evidence" all along. I'll never know. But it doesn't matter because caulk is a go!

Don't tell S, but in truth, I was about to surrender. I had nearly resigned myself to looking at these holes every day. After all, the man agreed to light pink in our master bedroom. That counts for a lot in my book. It should have been my turn to compromise, right? But S is a better, less stubborn person than I am.

To celebrate my success, I experimented with the caulk gun last weekend, filling in the gaps around the door casings in our upstairs hallway. Here are a few before and after photos.


The upstairs hallway has now been freshly painted and the caulk made all the difference. I can hardly believe how good the hallway looks, thanks to a little caulk. I'll share the hallway makeover in a few days. And in the coming weeks, I'll be filling in all those gaps in our bedroom. Hooray!
 

~The Papered House has a strange definition of success


Bookmark and Share